
10 Common Geomembrane Installation Mistakes and How to Avoid Them
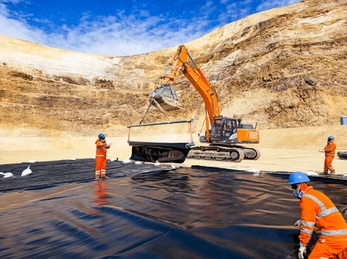
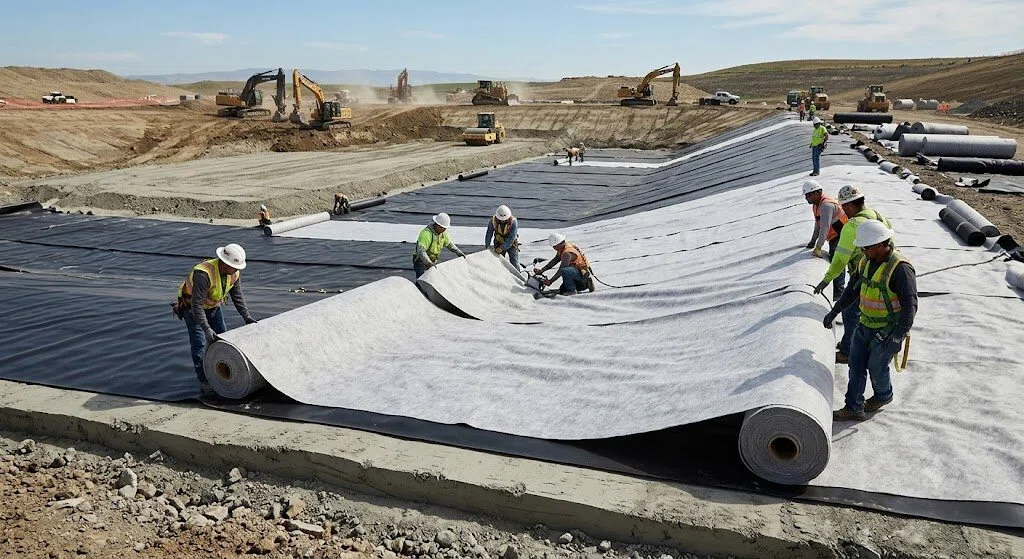
Geomembrane installation plays a critical role in containment systems used in landfills, mining heap leach pads, wastewater lagoons, and irrigation ponds. When installed correctly, geomembranes provide a long-lasting impermeable barrier that protects soil and groundwater from contamination.
However, many containment failures are not caused by material defects but by geomembrane installation errors during construction. Issues such as poor subgrade preparation, improper welding, or incorrect anchoring can significantly reduce liner performance.
Understanding the most common geomembrane mistakes and implementing proper geomembrane QAQC procedures can dramatically reduce the risk of leaks and costly repairs. This guide highlights ten frequent geomembrane installation problems and practical solutions used by experienced engineers and installers.
Table of Contents
Geomembrane installation — top 10 mistakes, causes and fixes
1.Poor Subgrade Preparation
One of the most common causes of geomembrane installation errors is inadequate subgrade preparation.
If the foundation contains sharp stones, debris, or uneven surfaces, the geomembrane may puncture or stretch under load.
Solution
Proper geomembrane subgrade preparation should include:
- Removing sharp rocks and organic material
- Achieving the required geomembrane subgrade smoothness requirements
- Compacting soil to the specified density
- Installing a protective geotextile underlayment
2.Wrinkles in the Geomembrane
Wrinkles often occur when geomembrane installation takes place during temperature changes. Large wrinkles may create stress points or interfere with proper welding.
This problem frequently appears in HDPE geomembrane installation mistakes, particularly in hot climates.
Solution
To avoid wrinkles:
- Follow proper geomembrane unfolding techniques
- Install panels during stable temperature conditions
- Use temporary ballast to control movement
- Smooth wrinkles before welding seams
Knowing how to avoid geomembrane wrinkles during installation can significantly improve seam quality.
3.Incorrect Welding Temperature
Improper welding settings are responsible for many geomembrane seam testing failures.
When wedge welders operate at incorrect temperatures or speeds, the seam may become weak or incomplete.
Common causes include:
- Incorrect geomembrane wedge welder settings
- Welding during cold weather
- Contaminated seam surfaces
Solution
Follow a strict welding procedure:
- Conduct trial welds before starting production
- Monitor geomembrane welding temperature problems
- Adjust speed and pressure based on material thickness
The ASTM welding testing standards provide guidance for seam evaluation.
4.Insufficient Panel Overlap
Incorrect geomembrane overlap requirements can result in seam failures.
If the overlap is too small, weld strength may be compromised.
Solution
Most geomembrane installation specifications require overlaps between 100–150 mm depending on the project.
During geomembrane installation, installers should always verify overlap alignment before welding begins.
5.Anchor Trench Installation Errors
Improper anchoring is another common geomembrane anchoring error.
Shallow or poorly constructed anchor trenches may allow the liner to slip under tension.
Solution
Correct geomembrane anchor trench depth requirements typically include:
- Adequate trench depth
- Proper folding of liner edges
- Secure backfilling and compaction
Avoiding geomembrane trench anchor installation mistakes is especially important for steep slopes and landfill liners.
6.Damage from Construction Equipment
Heavy equipment operating near exposed liners can cause serious geomembrane puncture damage.
Examples include:
- Tracks from bulldozers
- Dropped tools
- Sharp aggregate during soil placement
These types of damage are common in mining heap leach pad geomembrane installation projects.
Solution
To improve geomembrane puncture prevention:
- Restrict vehicle movement on exposed liners
- Use protective geotextile layers
- Install temporary walkways for workers
7.Wind Damage During Installation
Wind is a major challenge in large-scale geomembrane installation projects.
Strong wind may lift panels, cause wrinkles, or lead to panel misalignment.
Solution
Experienced installers know how to prevent geomembrane wind damage during installation by:
- Using sandbags or ballast
- Scheduling installation during low-wind conditions
- Securing panels quickly after deployment
8.Improper Termination Details
Incorrect geomembrane termination details can lead to leakage at edges and penetrations.
Typical problems include:
- Loose termination bars
- Improper sealing around pipes
- Poor edge sealing along concrete structures
Solution
A correct geomembrane termination bar installation should include:
- Stainless steel fasteners
- Sealant between liner and structure
- Proper spacing of bolts
These steps ensure a watertight connection between the geomembrane and adjacent structures.
9.Inadequate Seam Testing
One of the most critical steps in geomembrane installation is seam testing.
Without proper inspection, small welding defects may go unnoticed until leakage occurs.
Solution
A complete geomembrane QAQC checklist should include:
- Geomembrane spark testing procedure
- Geomembrane vacuum box testing pressure verification
- Destructive seam testing samples
Proper geomembrane CQA requirements help confirm seam integrity and installation quality.
10.Lack of Protection Layer
After welding is completed, exposed liners remain vulnerable until soil cover is placed.
Improper soil placement often causes liner punctures.
Solution
To avoid geomembrane protection layer damage:
- Follow geomembrane cover soil thickness requirements
- Use rounded aggregate
- Place soil carefully using low-ground-pressure equipment
These measures are essential for long-term containment performance.
Best Practices for Successful Geomembrane Installation
Experienced contractors follow several key geomembrane installation best practices:
| Installation Stage | Key Quality Control Measures |
|---|---|
| Subgrade preparation | Smooth surface and remove sharp objects |
| Panel deployment | Follow controlled geomembrane unfolding techniques |
| Welding | Monitor temperature and welding speed |
| Seam inspection | Perform spark and vacuum testing |
| Final protection | Install geotextile and cover soil |
Implementing a proper geomembrane installation quality control plan helps prevent costly failures and ensures compliance with engineering specifications.
Conclusion
Successful geomembrane installation depends on careful planning, trained installers, and strict quality control procedures. By avoiding the common geomembrane installation mistakes described above, engineers and contractors can significantly improve containment system performance.
Implementing strong geomembrane QAQC practices, proper seam testing, and accurate installation procedures ensures that geomembranes deliver the long-term environmental protection they were designed for.
FAQ
Why is my geomembrane leaking after installation?
Leakage usually occurs due to seam defects, punctures from sharp objects, or poor anchoring. A full seam inspection using spark testing or vacuum box testing can help identify the source.
Can geomembrane be installed in rain?
Most engineers recommend avoiding welding during rain. Moisture on the liner surface can cause seam contamination and welding failure.
What happens if geomembrane gets wet during installation?
If the liner becomes wet, it should be cleaned and dried before welding. Welding on wet surfaces can create weak seams.
Should geomembrane be tight or loose?
During geomembrane installation, liners should not be excessively stretched. Slight slack allows the material to accommodate temperature expansion and settlement.
How many people are needed to install geomembrane?
Small pond liners may require only a few workers, while large landfill geomembrane installation projects often involve specialized crews including welders, inspectors, and QA/QC engineers.