
Geomembrane Repair Guide: Professional Remediation & Patching Methods
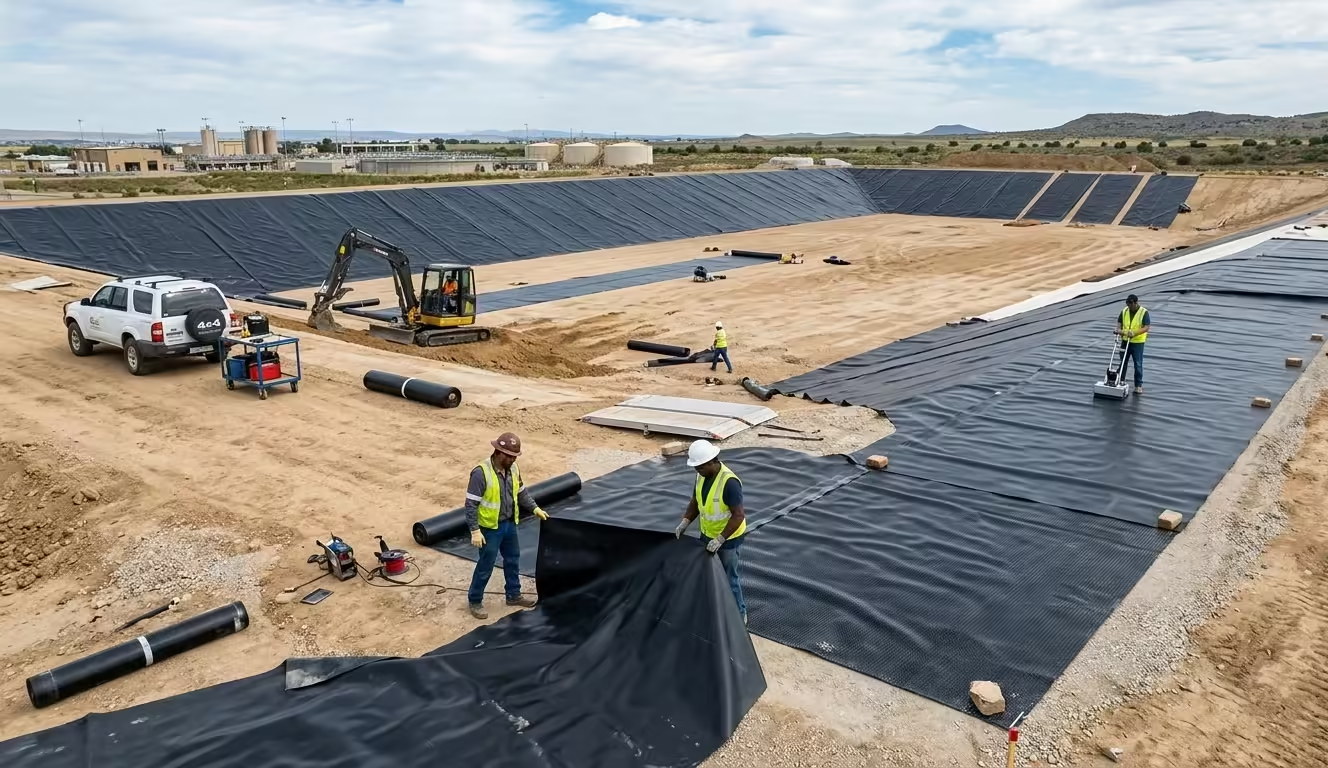
In environmental containment—from mining heap leach pads to municipal reservoirs—the liner’s integrity is the only barrier between operations and environmental catastrophe. Even High-Density Polyethylene (HDPE) or LLDPE liners are susceptible to punctures from heavy machinery, stress cracking, or thermal expansion.
Executing a professional geomembrane repair guide protocol is essential because simply “plugging a hole” is insufficient for industrial compliance. It requires a deep understanding of polymer science and specialized welding techniques to restore the original tensile strength of the barrier system.
Table of Contents
Initial Assessment: Diagnosing the Failure
Before starting any geomembrane repair guide steps, you must determine the root cause of the damage. A “fishmouth” seam failure requires a fundamentally different approach than a jagged puncture caused by an excavator bucket.
For engineers wondering how to fix geomembrane leaks effectively, the first step is to clean and dry the area to reveal the full extent of the “heat-affected zone.” If the damage is caused by stress cracking, this geomembrane repair guide recommends that the patch must extend significantly beyond the visible stress points to prevent the crack from propagating further under the patch.
Emergency Leak Repair vs. Permanent Remediation
In industrial scenarios, an emergency leak repair is often necessary to prevent immediate environmental contamination. These temporary fixes typically involve specialized adhesive tapes or mechanical clamps.
While useful, these are never a permanent solution. This geomembrane repair guide emphasizes that permanent remediation involves geomembrane patching using a material identical to—or more robust than—the parent liner. If you are repairing an 80-mil HDPE liner, the patch material must match the same resin batch to ensure chemical compatibility and thermal expansion symmetry.
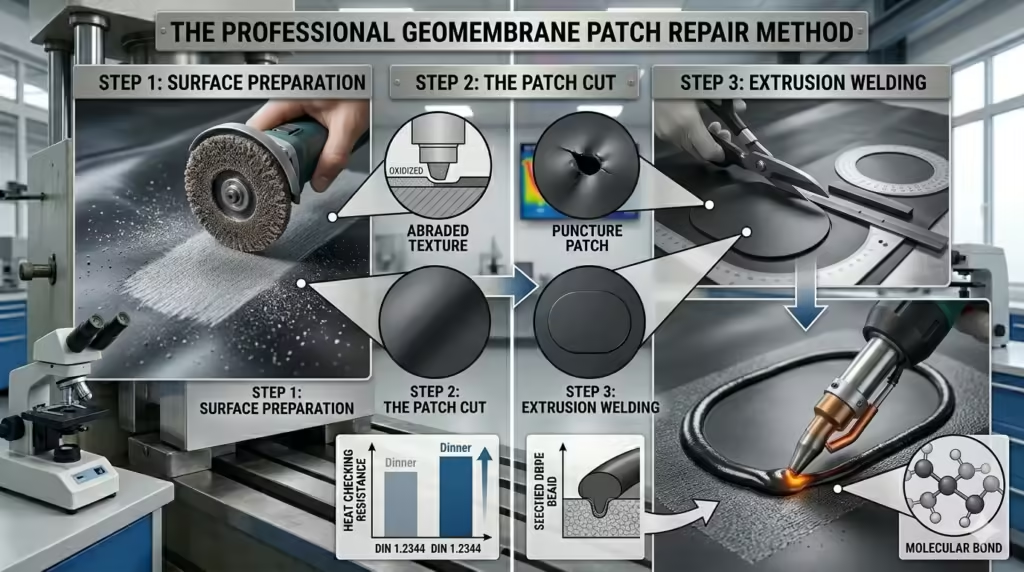
The Professional Geomembrane Patch Repair Method
For a patch to hold under hydrostatic pressure, the installation must follow a strict engineering protocol. This is the technical core of our geomembrane liner repair guide.
Step A: Surface Preparation
Contamination is the enemy of a successful weld. All dirt, moisture, and oxidation must be removed. Technicians use a handheld grinder to buff the area, removing the “oxidized skin” of the HDPE. Following the geomembrane repair guide correctly means exposing “virgin” resin, which is essential for molecular fusion.
Step B: The Patch Cut
The patch should be circular or oval. Square patches with 90-degree corners create “stress risers” where the liner is most likely to peel. This geomembrane repair guide requires the patch to extend at least 6 inches (150mm) beyond the edge of the damage in all directions.
Step C: Extrusion Welding
For most on-site remediation, extrusion welding is the preferred geomembrane patch repair method. A molten bead of resin is applied along the patch edge, fusing it to the base liner. Executing the geomembrane repair guide protocols correctly here creates a monolithic bond that resists the shear forces typically found in sloped containment areas.
Authority Reference: The Geosynthetic Institute (GSI) provides the GS-11 standard for the installation and repair of geosynthetics. Source: GSI Standards.
Material Selection for Industrial Compliance
The success of any geomembrane repair guide depends heavily on the compatibility of the repair rod and the patch material. Using a PVC patch on an HDPE liner will lead to immediate failure because the polymers cannot bond at a molecular level.
A robust geomembrane repair guide must prioritize Manufacturer’s Quality Control (MQC) certificates. This ensures that the patch material meets the same ASTM standards for puncture resistance and carbon black content as the original installation.
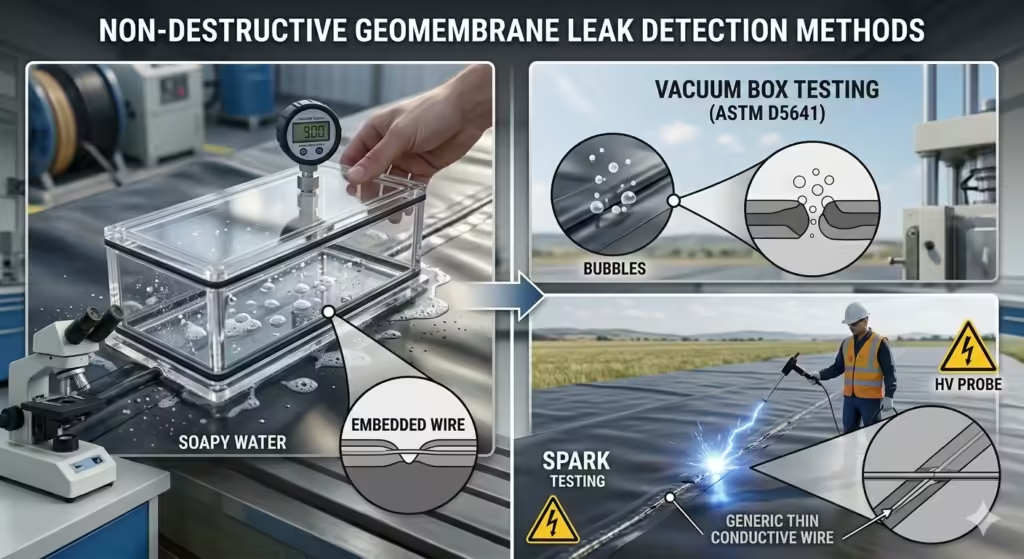
Quality Assurance: Testing the Integrity
A geomembrane repair guide is only as good as its verified performance. In the professional sector, “hoping it holds” is an unacceptable risk.
- Vacuum Box Testing: A clear box is placed over the repair, a vacuum is pulled, and soapy water is used to detect bubbles. No geomembrane repair guide is complete without this non-destructive verification.
- Spark Testing: For large-scale remediation, a conductive wire is placed in the weld. A high-voltage probe is passed over the area; if a leak exists, a spark will jump through the defect.
Environmental Precautions and Construction Safety
Field-based work often takes place in harsh conditions. High winds can lift liners (creating a “wind uplift” hazard), and extreme heat can cause the liner to expand and “wrinkle.”
This geomembrane repair guide advises against welding during the peak heat of the day when the liner is at its maximum expansion. Furthermore, all grinding and welding equipment must be explosion-proof if working in landfill environments where methane gas may be present.
Authority Reference: ASTM D4439 is a critical reference for the terminology and basic properties of geosynthetics. Source: ASTM International.
Lifecycle Impact of Proactive Maintenance
Frequent inspections can significantly reduce the complexity of a geomembrane repair guide application. By identifying small abrasions before they turn into full-thickness punctures, operators can use simpler remediation techniques.
Using a proactive geomembrane repair guide within your facility’s SOP will include monthly drone flyovers to check for signs of ballast displacement. This ensures that every necessary geomembrane repair is handled before it becomes a multi-million dollar liability.
Final Verdict
Successful liner remediation is a blend of specialized equipment and rigorous adherence to ASTM standards. Whether you are dealing with a 500-gallon tank or a 50-acre reservoir, the principles of cleanliness, material compatibility, and verified testing remain the same.
Do not let a minor puncture become a major environmental liability. Follow our proven geomembrane liner repair guide and invest in quality welding to ensure your containment system remains impenetrable.
FAQ
Why follow a professional Geomembrane Repair Guide instead of using industrial glues?
HDPE is chemically resistant to almost all adhesives. For a structural repair, heat welding (fusion or extrusion) is the only method recognized by engineering standards to ensure a permanent bond.
Can you repair a geomembrane underwater?
While emergency leak repair kits exist for underwater use, they are mechanical or adhesive-based. For a permanent, welded fix, the area must be dewatered, cleaned, and dried as per this geomembrane repair guide.
How long does a typical geomembrane patch last?
If performed using the correct geomembrane patch repair method, the repair should last as long as the original liner, often 20 to 50+ years depending on environmental exposure.